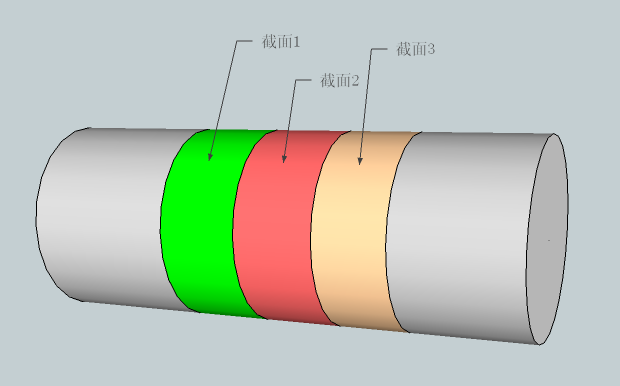
1. Probe Configuration on Spindle Section 1
There are two probe regulators on section 1, 180 degrees apart. Each regulator is equipped with a two-channel combination of ultrasonic line focus probes, and the transverse wave incident clockwise.
Detection Defects: Clockwise Detection of Subcutaneous Defects of Round Steel
Central Frequency: 5.0MHz + 10%
Coupling mode: water immersion method
Quantity: Two groups of probes, each containing two combinations of wafers, the two groups of probes are distributed in the circumferential direction of the workpiece, with an interval of 180 degrees, on the same cross-section. There are four independent channels.
2. Probe Configuration on Spindle Section 2
There are two probe regulators on section 2, each 180 degrees apart. Each regulator is equipped with a two-channel combination of ultrasonic line focus probes, longitudinal wave incidence.
Testing defects: metallurgical defects inside steel bars.
Detection range: central cross-hole.
Central Frequency: 5.0MHz + 10%
Coupling mode: water immersion method
Quantity: Two groups of probes, each consisting of two combinations of wafers, are distributed in the circumferential direction of the workpiece with an average interval of 180 degrees and four independent channels on the same cross-section.
3. Probe Configuration on Spindle Section 3
There are two probe regulators on section 3, each 180 degrees apart. Each regulator is equipped with a two-channel combination of ultrasonic line-focus probes, which incident transverse waves counterclockwise.
Detection Defects: Detection of Subcutaneous Defects of Round Steel Counterclockwise
Central Frequency: 5.0MHz + 10%
Coupling mode: water immersion method
Quantity: Two groups of probes, each consisting of two combinations of wafers, are distributed in the circumferential direction of the workpiece with an average interval of 180 degrees and four independent channels on the same cross-section.

Defect detection standard
Ultrasound Testing Method for Forged Rolled Steel Bars GB/T4162-2008


